Tuesday, 22 July 2014
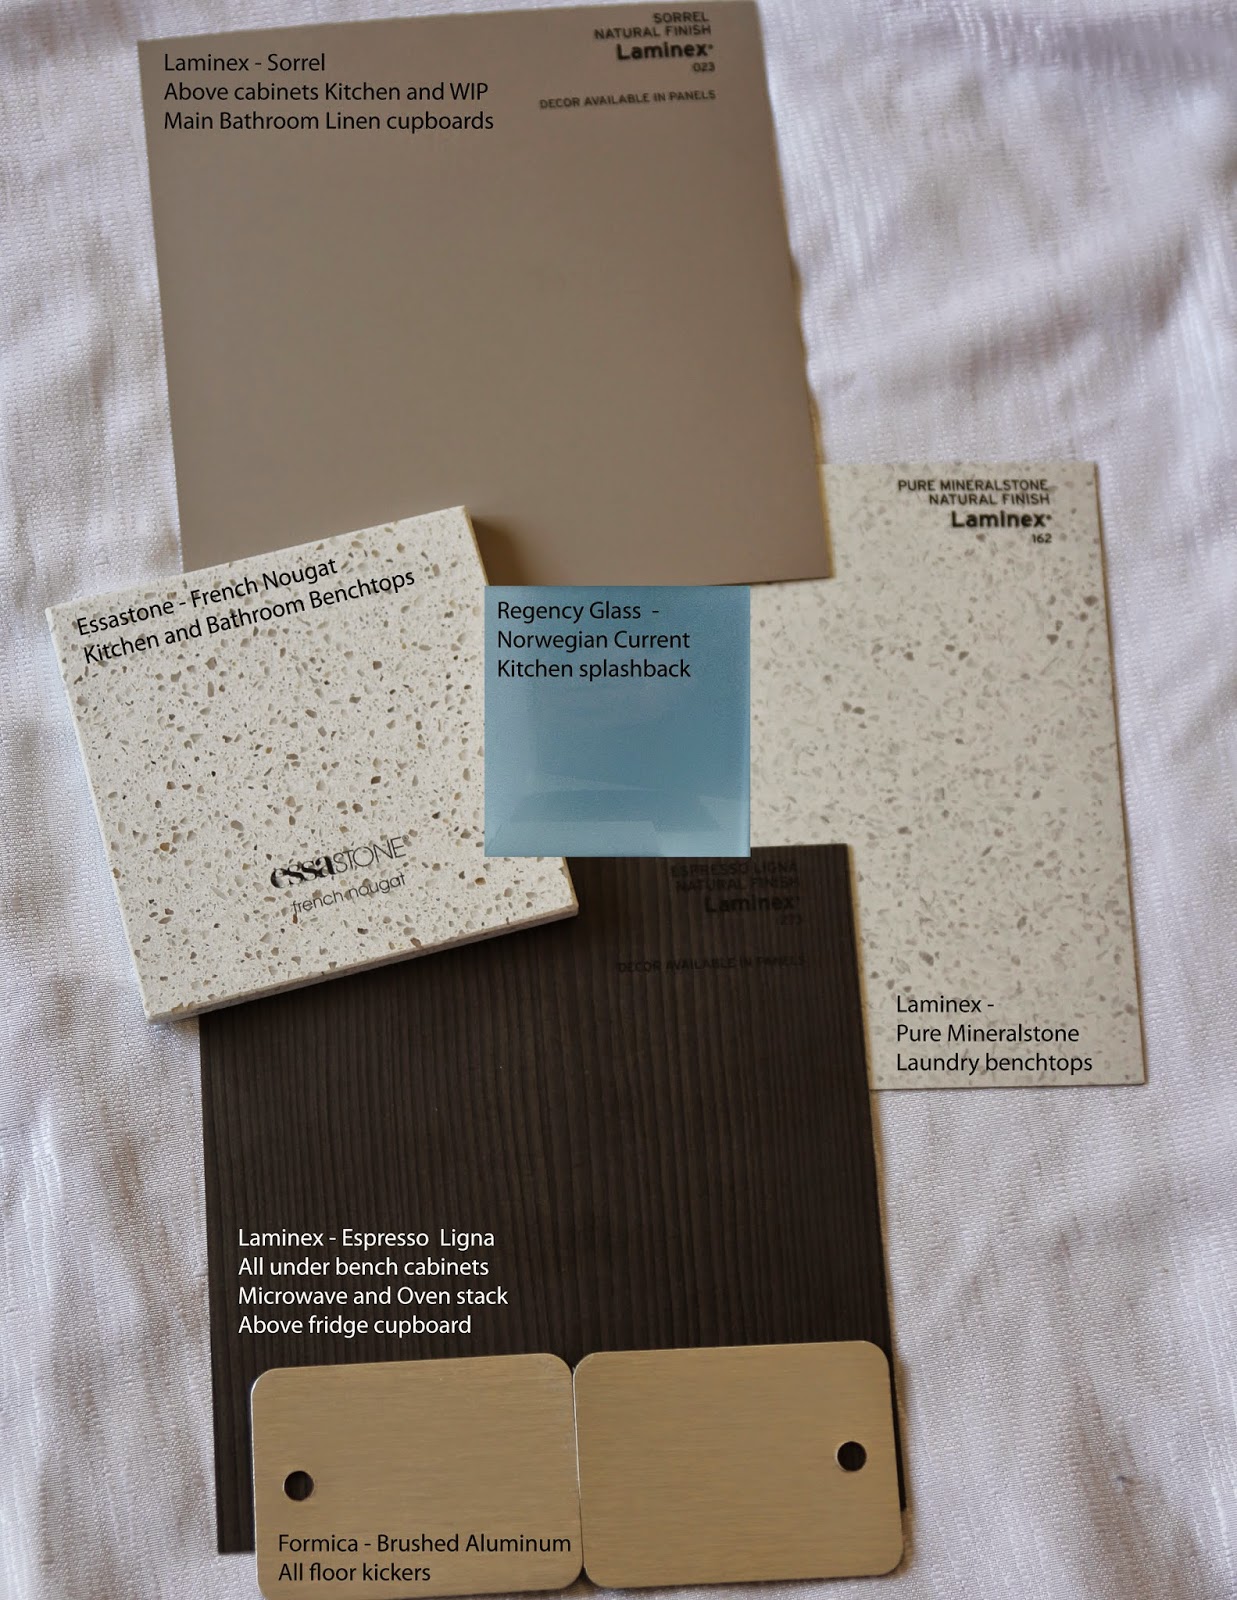
Kitchen selections
Next on the selections list was a meeting with Neil from Toser Design at Lonsdale. We went to the meeting after seeing some of their work in a local Metricon display home and understanding based on this that the sky is the limit!
Neil was fantastic at stepping us through each room and tieing all our designs together. His approach to functionality & style relative to budget was absolutely appreciated.
Other choices we made include handles, soft close drawers, built in bin, walk in robe, semi-integrated dishwasher.
 |
| Our kitchen, bathroom and laundry selections |
 |
| Design of our cooktop/oven/fridge wall. |
 | ||||||||||
Our kitchen colour inspiration from Metricon's studio M online tool
|
Saturday, 19 July 2014
Tile selections
Selections #1
Before visiting Beaumont tiles for our selections, we had made a number of trips to understand what the standard allowance for Homestead included. This made the start of our selections interview much simpler, as we had an idea what style we wanted and whether there would be a variation for our selection. Leah was excellent in helping choose any features, grout and styles. Unfortunately our allowance in the contract wasn’t communicated correctly via Homestead and Beaumont’s, so we were unable to complete our selections. Another appointment was scheduled to complete the selections process.
Selections #2
Leah was unavailable the day we completed our selections, however June was brilliant in helping us with the minute detail of how our wet areas would be finished. We are very happy with the outcome and can’t wait to see our bathrooms.
 |
| Wet area selections |
Wednesday, 16 July 2014
Tuesday, 15 July 2014
Picking white
We went into the exercise thinking we wanted our home painted in Dulux Whisper White.
Homestead quickly put a stop to this, mentioning that isn't a standard colour, as it does not cover the walls with the builders standard paint application and would require extra costs. A suggestion of either a ‘Homestead Whisper’ (a greyer custom version of Whisper White) or Antique White U.S.A. was made. Looking through some example rooms painted with Antique White U.S.A, we were very happy with the choice.
Note - Dulux Antique White is not the same as Dulux Antique White U.S.A. A mix up of a sample pot at Bunnings quickly taught us this! Also, the Bunnings paint mix system cannot find Antique White U.S.A. without the '.' between the USA.
 |
| Test pot of Antique White U.S.A. with painted gyprock and Super White tile from bathroom |
 |
| Antique White U.S.A. vs Whisper White (extracted from http://www.dulux.com.au/ColourWallFB/252438/Inbound.aspx) |
Saturday, 12 July 2014
Meeting our electrician
As we decided to use a Clipsal C-Bus system for our lighting, Homestead allowed us to organise a meeting with the contracted electrician for our site.
We were introduced to Steve from Lidd Electrical to assist us with any specifications other than the standard allowance, so that cabling could suit C-Bus.
We went to the meeting quite prepared and with a strong understanding of C-Bus. We had a rough lighting plan (below), as well as an associated spreadsheet containing group addresses, cable run from C-Bus cabinet to load, plus allowance for lighting load circuit (e.g. extra cable length for down light installation post handover). Steve took a pragmatic view and was able to price the gaps (compared to the standard Homestead contract) required for installing the 240v portion of the installation.
The design of our system involves 4x 8 channel dimmer packs and 1x 12 channel relay module.
 | ||
Lighting plan
|
Tuesday, 1 July 2014
Council planning consent
Our consultant had advised the residential code council approval would take approximately 1 month, but if our development had to go through a normal approval process 2-3 months. To our surprise, we received a phone call only 2 weeks after to inform us planning consent approval had been granted!
Following this we received the final engineer's report, bank pack and selections documentation. Amanda contacted the contracted selections companies and booked appointments for us to discuss all things colourful and shiny.
Subscribe to:
Comments (Atom)


